Filter List Screens by Logged-in User Properties
This guide is for app makers building in the NotionApps builder.
It explains how to make one list screen show different rows for different people — based on properties on their user profile — without duplicating the screen for every store, team, or location.
If you only remember one sentence:
On a list’s Filtering section, you can set a filter value to Logged-in user property so
Tasks.Storematches whatever Store is on the person who is currently logged in.
Who this is for
Section titled “Who this is for”Use this guide if you:
- Build or edit apps in the builder
- Have list screens (Tasks, Orders, Tickets, Restaurants, etc.)
- Want each employee to see only their rows on a shared list
- Are tired of cloning the same list once per store and wiring Screen Visibility Logic on every clone
You do not need this guide for:
- Hiding an entire screen from some roles (that is still Screen Visibility Logic)
- Letting end users change filters themselves in the live app (that is In-App Filtering)
- Database-wide access rules (that is Data Restriction, configured separately)
The idea in plain language
Section titled “The idea in plain language”Today, a normal list filter looks like this:
Show tasks where Store equals "North"That value "North" is fixed. Everyone who opens the list sees North tasks only.
The new option lets you write:
Show tasks where Store equals (the Store on the logged-in user)So:
- When User A (Store = North) opens Tasks → User A sees North tasks
- When User B (Store = South) opens the same Tasks screen → User B sees South tasks
- You maintain one screen instead of three
That is all this feature is: a smarter kind of filter value on a list.
Full example: multi-store Tasks app
Section titled “Full example: multi-store Tasks app”Walk through this example once. Everything else in the guide is the same pattern with different property names.
Your data
Section titled “Your data”Tasks database:
| Task | Store | Status |
|---|---|---|
| Restock milk | North | Open |
| Fix freezer | South | Open |
| Clean lobby | East | Open |
| Count till | North | Open |
Users (employees who log into the app):
| Employee | Store | |
|---|---|---|
| User A | user-a@example.com | North |
| User B | user-b@example.com | South |
| User C | user-c@example.com | East |
What you want
Section titled “What you want”| Person | Opens | Should see |
|---|---|---|
| User A | Tasks | Restock milk, Count till |
| User B | Tasks | Fix freezer |
| User C | Tasks | Clean lobby |
The old way (what you can stop doing)
Section titled “The old way (what you can stop doing)”- Duplicate Tasks → “North Tasks”, “South Tasks”, “East Tasks”
- On North Tasks, set filter
Store equals North(fixed value) - On North Tasks, set Screen Visibility so only North users can open it
- Repeat for South and East
- Hit screen limits as you add more stores
The new way (what this guide teaches)
Section titled “The new way (what this guide teaches)”- Keep a single Tasks list
- Turn on Allow logged-in user property filters for that list
- In Filtering, set:
Storeequals Logged-in user property →Store - Publish and test as User A and User B
No per-store clones. No Screen Visibility rules for this pattern.
Before you start (maker checklist)
Section titled “Before you start (maker checklist)”1. Your databases need matching properties
Section titled “1. Your databases need matching properties”For the Tasks example to work:
- The Users database (the people who log in) must have a property such as Store.
- The Tasks database must have a property such as Store.
- Those two properties should be the same kind of field:
- both Select with the same options, or
- both Relation pointing at the same Stores database
Mixing unrelated types (text vs relation, different option sets) usually gives empty or surprising results.
Rename freely in your app — the property does not have to be called “Store”. Common alternatives: Location, Team, Region, Branch, Department, Restaurant.
2. Every user who should see rows needs that property filled in
Section titled “2. Every user who should see rows needs that property filled in”If User A’s Store is blank, User A’s Tasks list will be empty.
That is intentional safety behavior: the app will not “show everything” when it cannot tell which store User A belongs to.
Before you test, open your Users data and confirm each test employee has Store set.
3. Your subscription must be Pro or above
Section titled “3. Your subscription must be Pro or above”Logged-in user property filters require a Pro, Premium, or Enterprise plan. They are not included on Free or Plus.
In the builder, on a list screen, look for a section titled:
Logged-in user property filters
with a switch:
Allow logged-in user property filters
| What you see | What it means |
|---|---|
| Switch works; you can turn it On | Your plan includes the feature — continue this guide |
| Switch is disabled / locked, with a message that the feature is not available on your plan or has been disabled | Your plan is below Pro, or the feature has been disabled for this account/app. Upgrade to Pro or above, or ask your NotionApps admin/support contact to enable it. You cannot unlock this yourself from the builder. |
Until that switch can be turned on, stick with fixed-value filters (the classic behavior).
Step-by-step: set up the Tasks example
Section titled “Step-by-step: set up the Tasks example”Step 1 — Open the list screen
Section titled “Step 1 — Open the list screen”- Open your application in the builder.
- Select the Tasks list screen in the left navigation or preview (the one shared list — not a store-specific clone).
- Keep the right-hand configuration panel open for that list.
You should be editing a List screen. Forms, detail pages, and visibility-only settings are the wrong place for this feature.
Step 2 — Allow logged-in user property filters on this list
Section titled “Step 2 — Allow logged-in user property filters on this list”On the Tasks list inspector, find:
Logged-in user property filters
- Turn Allow logged-in user property filters On.
What this switch does:
| Setting | Effect |
|---|---|
| On | This list is allowed to use filter values of type Logged-in user property |
| Off | This list only allows classic Fixed value filters (same for every user) |
Important details:
- This switch is per list. Turning it on for Tasks does not change Orders unless you do the same there.
- Turning the switch On alone does not filter anything yet. You still have to add a filter in the next step.
- Turning it Off later disables user-property filters on that list only (handy if you want to revert one screen without affecting others).
Help text on the section (paraphrased) explains that you can compare a list property to a property on the logged-in user’s profile — for example Store on the list equals Store on the user.
Step 3 — Open Filtering (not Screen Visibility)
Section titled “Step 3 — Open Filtering (not Screen Visibility)”Still on the Tasks list, open the Filtering section.
Also do not confuse this with In-App Filtering:
| Section | Who configures it | Who changes it while using the app |
|---|---|---|
| Filtering (this guide) | You, the maker | Nobody — it is fixed by you (but can be dynamic per user) |
| In-App Filtering | You enable columns | End users pick their own filter values |
| Screen Visibility Logic | You, the maker | Nobody — hides or shows the whole screen |
Step 4 — Add the Store filter
Section titled “Step 4 — Add the Store filter”- Add a new filter condition (or edit an existing Store filter).
- Set the left-hand property to Store from the Tasks database (the list’s data).
- Set the operator to equals (or the closest match your UI offers).
- Find the value type control for that filter row. You should now see two choices:
| Value type | Meaning |
|---|---|
| Fixed value | You pick a specific Store (North, South, …). Same for every user. |
| Logged-in user property | You pick a property from the logged-in user’s profile. Different per user. |
- Choose Logged-in user property.
- When prompted for which user property, choose Store (the Store on the user profile — not a fixed “North” option).
You have now said:
Tasks.Store equals Logged-in user’s StoreIf you do not see “Logged-in user property”
Check in order:
- Is Allow logged-in user property filters On for this list? (Step 2)
- Are you in Filtering, not Screen Visibility?
- Is the switch locked because the app is not entitled? Ask admin/support.
- Did you refresh / reopen the list after the feature was enabled?
Optional: combine with a normal fixed filter
You can add a second condition that still uses Fixed value, for example:
- Status equals
Open
Then User A sees North tasks that are Open.
User B sees South tasks that are Open.
Both conditions must be true.
Step 5 — Save / publish
Section titled “Step 5 — Save / publish”- Save your builder changes as you normally would.
- Publish the app so end users get the new filter behavior.
Until you publish, people on the live link may still see the old unfiltered (or old cloned) lists.
Step 6 — Test the way a real employee would
Section titled “Step 6 — Test the way a real employee would”Do not only glance at the builder preview if you can help it. Log into the published app (or use whatever “view as user” tooling you have) as two different people.
Test A — User A (Store = North)
- Log in as User A.
- Open Tasks.
- Expect: Restock milk, Count till.
Do not expect: Fix freezer, Clean lobby.
Test B — User B (Store = South)
- Log out; log in as User B.
- Open the same Tasks screen.
- Expect: Fix freezer only.
Test C — blank Store (optional)
- Temporarily clear Store on a test user.
- Open Tasks as that user.
- Expect: no tasks.
- Put Store back; confirm rows return.
If Test A and Test B both see the full unfiltered list, jump to Troubleshooting.
Step 7 — Clean up old clones (when you are ready)
Section titled “Step 7 — Clean up old clones (when you are ready)”After the single filtered list works:
- Point navigation to the one Tasks list.
- Remove or unpublish “North Tasks / South Tasks / East Tasks” clones.
- Remove Screen Visibility rules that only existed to support those clones.
You can keep Screen Visibility for unrelated needs (for example, an Admin-only Dashboard). You just no longer need it to fake per-store lists.
Another short example (same steps, different names)
Section titled “Another short example (same steps, different names)”Scenario: Support tickets should show only tickets for the agent’s Team.
| Database | Property |
|---|---|
| Tickets list | Team |
| Users | Team |
Maker steps (abbreviated):
- Open the Tickets list.
- Turn Allow logged-in user property filters On.
- In Filtering:
Teamequals Logged-in user property →Team. - Publish.
- Log in as an agent on Team Alpha vs Team Beta and confirm different ticket sets.
Same feature, different property label.
What end users experience
Section titled “What end users experience”End users do not configure this.
They simply open the list and already see “their” rows. They will not see a special “logged-in user property” control. That control exists only in the builder for you.
They also should not be able to discover other stores’ rows through normal search or by opening a shared link to a row outside their filter — the platform enforces the filter when the feature is on.
Fixed value vs Logged-in user property (decision guide)
Section titled “Fixed value vs Logged-in user property (decision guide)”Ask yourself:
Should every person who opens this list see the same filtered set, or a set that depends on who they are?
| Answer | Use |
|---|---|
| Same for everyone (for example always hide Archived) | Fixed value |
| Depends on the person (their store, team, region) | Logged-in user property |
You can use both on the same list:
Store equals Logged-in user property → Store ← dynamicANDStatus equals Open ← fixedCommon mistakes (read this if it “does nothing”)
Section titled “Common mistakes (read this if it “does nothing”)”Mistake 1 — Toggle On, but value type still Fixed
Section titled “Mistake 1 — Toggle On, but value type still Fixed”Turning on Allow logged-in user property filters only unlocks the new value type.
You must still open Filtering and change that filter’s value type to Logged-in user property.
Mistake 2 — Editing Screen Visibility instead of Filtering
Section titled “Mistake 2 — Editing Screen Visibility instead of Filtering”Screen Visibility can already talk about the logged-in user for showing/hiding the whole screen, but it does not replace list row filters, and it does not use this new dual value-type control for content filtering.
For “same screen, different rows,” use Filtering.
Mistake 3 — Property mismatch
Section titled “Mistake 3 — Property mismatch”Examples that fail:
- Tasks.Store is a Relation; Users.Store is a Text string “North”
- Tasks uses option
North Branch; Users uses optionNorth - You filtered Tasks.Location but selected Users.Store by accident
Align names, types, and actual values in the source data.
Mistake 4 — Testing with only one user
Section titled “Mistake 4 — Testing with only one user”If you only ever log in as yourself, you cannot tell whether the filter is dynamic. Always test with two users who have different Store (or Team) values.
Mistake 5 — Expecting empty Store to show everything
Section titled “Mistake 5 — Expecting empty Store to show everything”Empty user property → empty list. Fill the user profile, or temporarily use a fixed filter while you clean data.
Mistake 6 — Leaving old clone screens in the nav
Section titled “Mistake 6 — Leaving old clone screens in the nav”People may still open “South Tasks” (fixed filter) instead of the new shared Tasks list. Update navigation after you migrate.
Turning the feature off for one list
Section titled “Turning the feature off for one list”If a list starts behaving wrongly and you need a quick revert:
- Open that list in the builder.
- Set Allow logged-in user property filters to Off.
- Publish.
User-property filter values on that list stop applying. Your fixed-value filters keep working. Other lists are unchanged.
You can also delete or change the specific filter condition back to Fixed value if you only want to undo one condition.
Troubleshooting for makers
Section titled “Troubleshooting for makers”| What you see | Likely cause | What to do |
|---|---|---|
| “Allow…” switch locked | Plan is Free/Plus, or feature disabled for this app | Upgrade to Pro or above, or contact admin/support to enable logged-in user property filters |
| No “Logged-in user property” in the value menu | Per-list switch is Off, or you are in the wrong section | Turn the switch On; edit Filtering on a List |
| Everyone sees all rows | Still using Fixed value, or not published | Set value type correctly; publish; hard-refresh the live app |
| Everyone sees zero rows | User Store empty or properties don’t match | Fix Users data; confirm property types |
| Only my user looks correct | Others have wrong/missing Store | Audit the Users database |
| Preview looks fine, live app doesn’t | Not published / cached old build | Publish again; retest in a private window |
| I changed Visibility and nothing happened | Wrong feature surface | Use list Filtering as in this guide |
Limits makers should know
Section titled “Limits makers should know”- Requires a Pro or above subscription (Pro, Premium, Enterprise). Not available on Free or Plus.
- This is for list Filtering (which rows appear on a list). It is not a redesign of Screen Visibility.
- It does not replace Data Restriction. If your org already uses Data Restriction for hard database ACL, keep that; this feature is the list-level “show the right rows on this screen” tool.
- If the logged-in user’s property is missing, the list shows no matching rows rather than all rows.
- You need the per-list allow switch On before the new value type appears.
Quick checklist (print / paste into a ticket)
Section titled “Quick checklist (print / paste into a ticket)”- Account is on Pro or above (not Free or Plus)
- Users database has the property (for example Store) filled for test users
- List database has a matching property (for example Store)
- Open the one shared list in the builder
- Allow logged-in user property filters → On
- Open Filtering (not Screen Visibility, not In-App Filtering)
- Add/edit filter: list property equals
- Value type → Logged-in user property
- Pick the matching user property
- Optional: add fixed filters (Status = Open, etc.)
- Publish
- Log in as User A and User B with different property values
- Confirm each sees only their rows
- Remove old per-store list clones when ready
One-page recipe (copy this)
Section titled “One-page recipe (copy this)”Goal: One Tasks list, filtered by each employee’s Store.
- Builder → select Tasks list
- Logged-in user property filters → allow On
- Filtering →
Storeequals Logged-in user property →Store - Publish
- Test as User A (North) and User B (South)
That is the whole feature for makers.
Other filter values on the same list
Section titled “Other filter values on the same list”The same Filtering section can also use:
- Nested and / or / not groups (up to 3 levels)
- Logged-in user (the person, not a property)
- Current row / Current row property on related lists
- Today, Now, Start of week, Start of month
- URL parameter — a missing query key matches no rows
Walkthrough: Filter lists with groups and dynamic values. Release notes: 15 Sep 2026 Release.
Updates in the 9 Aug 2026 release
Section titled “Updates in the 9 Aug 2026 release”- Logged-in user property filters can use relation fields on the user profile (for example Client or Company), not only selects/text.
- Combine with App audience when queues must also respect tenancy.
- Release notes: 9 Aug 2026 Release.
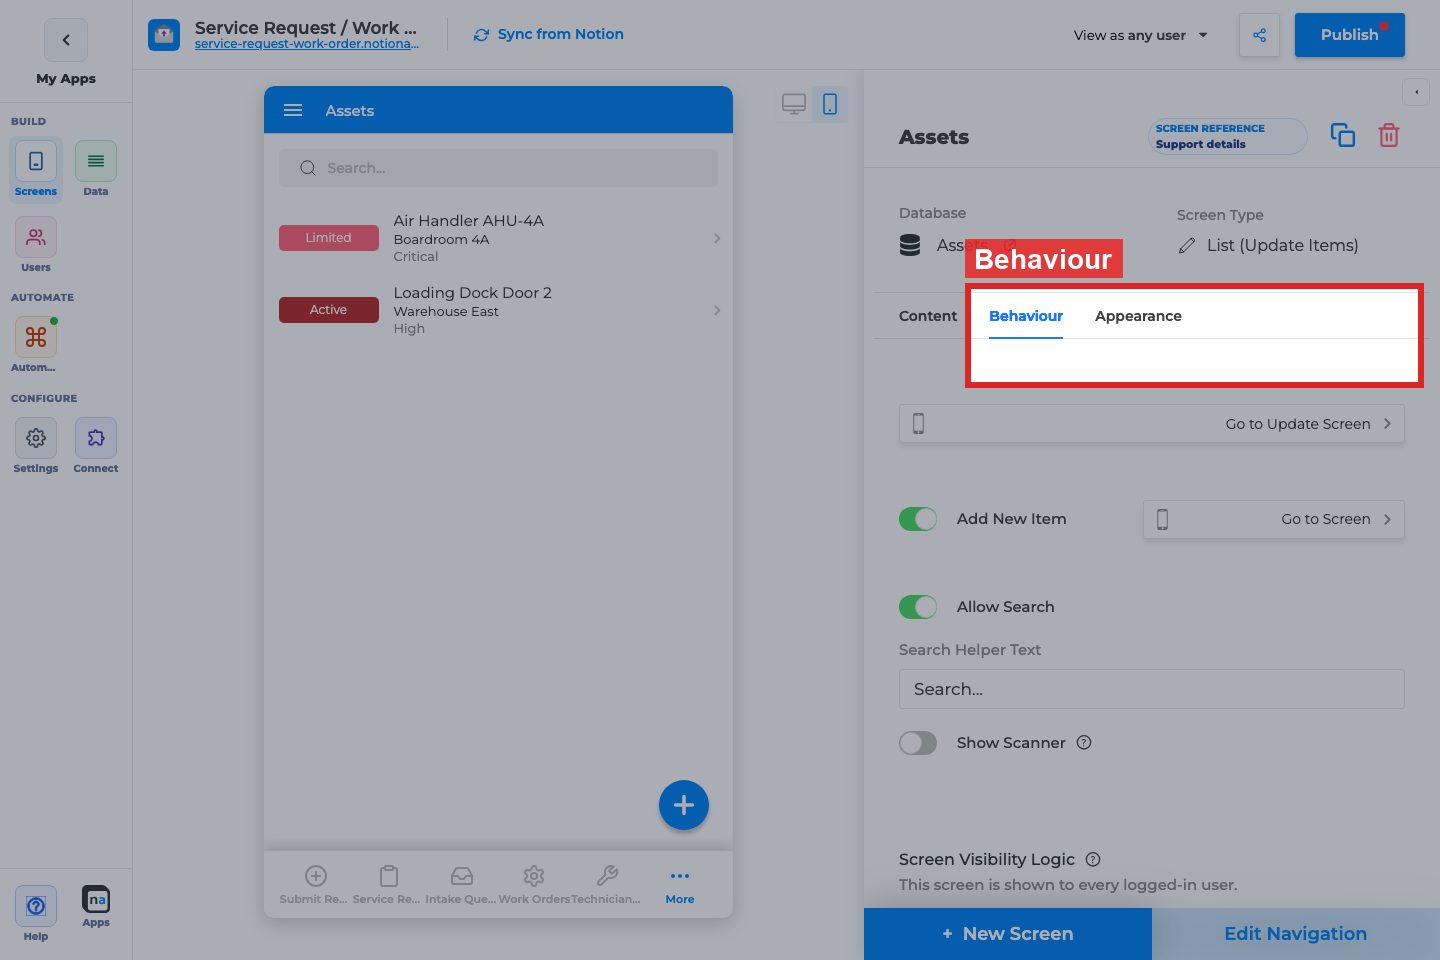
Annotated builder screenshots
Section titled “Annotated builder screenshots”

Complete Builder Options Reference
Section titled “Complete Builder Options Reference”These controls live on List Content. Full inventory: List (View Items) and List (Update Items).
Content → Filtering
Section titled “Content → Filtering”Logged-in user property filters
Section titled “Logged-in user property filters”What it does: Filters list rows by comparing a database property to a property on the signed-in Users row.
How to use it: Enable the toggle (Pro+), then map DB field ↔ user field (for example Store = User.Store).
Why / recommended default: Use for per-person/per-store lists. Do not confuse with Data Restriction (DB-wide) or In-App Filtering (end-user controls).
Data Filtering (fixed conditions)
Section titled “Data Filtering (fixed conditions)”What it does: Maker-defined filters that always apply.
How to use it: Combine with user-property filters when every user should also see only Open tasks, etc.
Why / recommended default: Keep fixed filters minimal; put personalization in user-property filters.